In this second tutorial software tools which is necessary to program STM32F3 is discussed. Most of software tools discussed in this tutorial series are FREE and open source. Problem with most of ARM developing tools are, they are designed for commercial use only. They offer free trial versions only with limited features. Keil Microcontroller Development Kit (MDK) which is available in STMicroelectronics web site also a non-free version software with 30 days trial period. And most of sample code they provide is designed for these software. The support for free development is very limited.
In this tutorial series we used CooCox CoIDE which is a free integrated development designed for ARM Cortex-M0/M0+/M3/M4 based microcontrollers. It is a distribution of Eclipse which is a famous Java developing IDE. It uses GCC-ARM-Embedded tool chain for compiling and debugging process.
Installing necessary tools and software.
Step 1 : Go to following link and download suitable compiler package for your computer.
https://launchpad.net/gcc-arm-embedded
Eg : Windows – Windows Installer
Linux – Linux installation Tarball
Step 2 : Then go to this second link and download CooCox CoIDE and CooCox CoFlash.
http://www.coocox.org/software.html
CooCox CoIDE is going to be our coding support tool and CoFlash is the software which is used to download the program into ARM Microcontroller.
Step 3 : Go to following link and download drivers for STSW-LINK for windows 8. If you are using other windows version please choose suitable installer for your OS.
http://www.st.com/web/en/catalog/tools/PF259459
Step 4 : Install STSW-LINK Driver software first and then install GCC-ARM-Embedded tool chain.
Step 5: Finally install CooCox CoIDE and CooCox CoFlash.
Now software installing process in over.
Understanding IDE and setup developing environment
Following figure shows IDE interface.
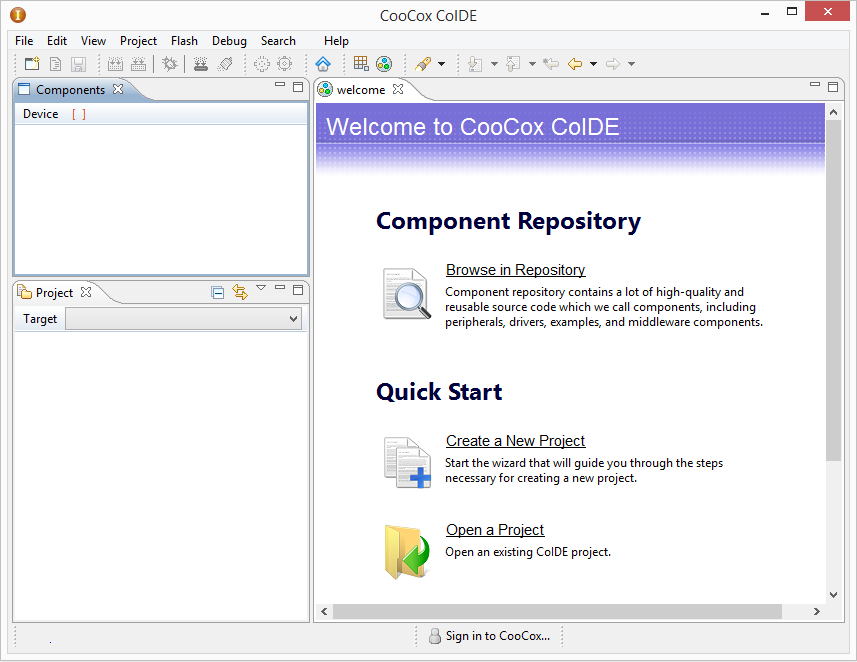
CoIDE interface
First thing to do in this interface is setting up Toolchain Path. For that, click on Project in menu bar, and then select “Select ToolChain Path” from drop down menu.
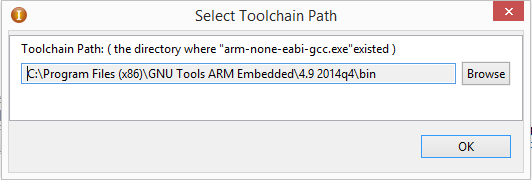
CoIDE Tool Chain
From the dialog box browse and select “bin folder” where GCC-ARM-Embedded tool chain is installed.
Then open CooCox coFlash form programs menu.
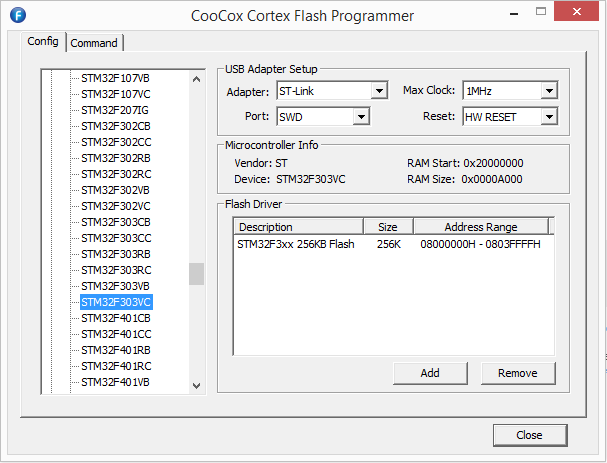
CoFlash Programmer
From the window, select device and then select adapter as “ST-Link” and Port as “SWD” close the window.
Now everything is ready to start programming and let’s start with creating new project.
Creating new Project
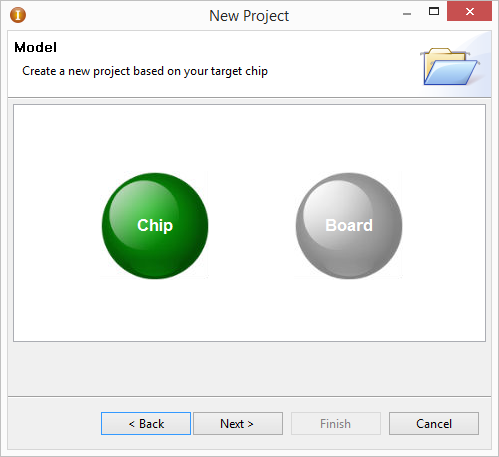
Step 1 : Click on “Project” in menu bar and select “New Project”. A new window will appear and then give a Project Name and Project Path and click next.
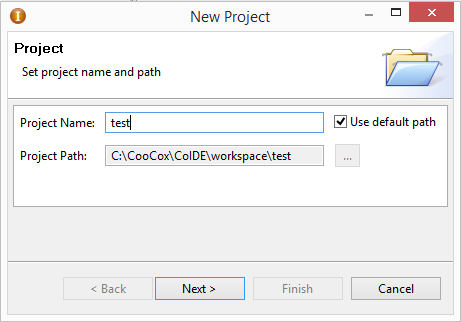
New Project Wizard
Now select chip from the following window and click next. Because this board is not available in the list.
New Project chip select
Then select chip on the board from list in following window ( ST -> STM32F303 -> STM32F303VC ) and click Finish button.
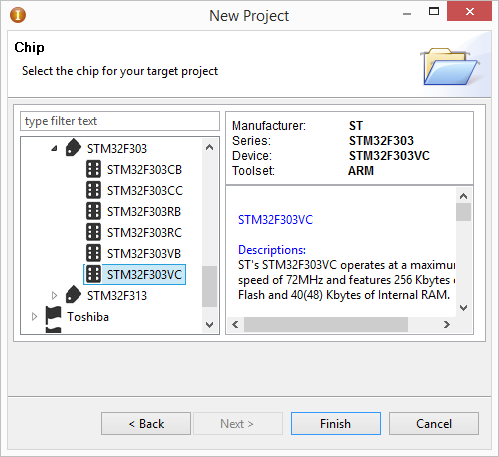
New Project – select STM32F303VC
Following window will appear after that.
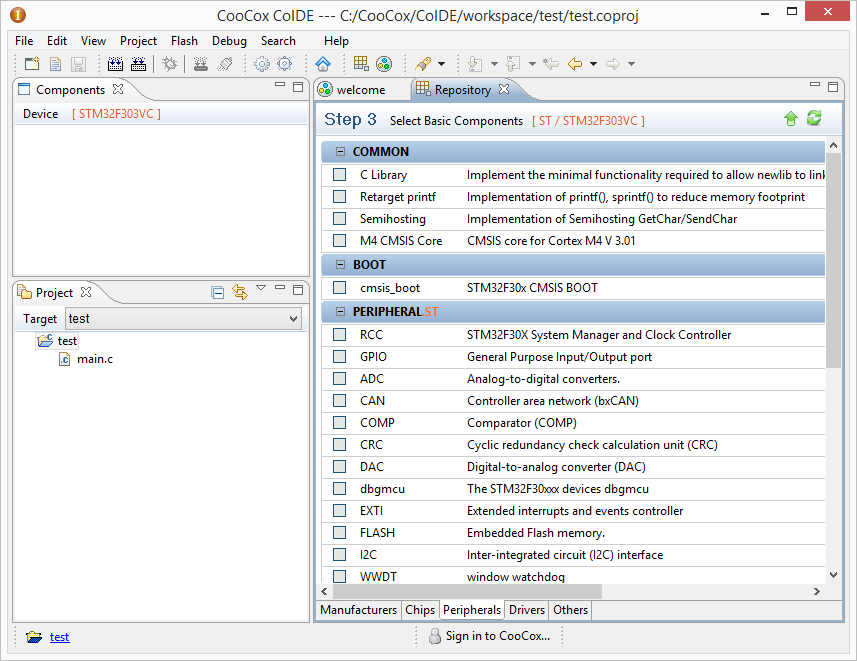
CoIDE work space
This window is the workspace of IDE. As you can see Repository contains pre written libraries for STM32F303VC chip. These libraries can include into project by just clicking check boxes. If you need more information about IDE, follow this link.
http://www.coocox.org/book/coocox/coide-dev-manual
In next tutorial, first program will be created to blink a LED.