
Please read following article before you begin.
Now you know about ports and Data Direction Register (DDR) from the last tutorial and you know how to give an output through port pins. As I said in the previous, if you change DDR value to 0 in a pin, it becomes an input. If you change DDR value to 1 in a pin, it becomes an output. So let’s see how to get an input with a port.
| PA7 | PA6 | PA5 | PA4 | PA3 | PA2 | PA1 | PA0 |
Above is your PORTA register. Before you begin, you should know that pin numbers of PORTA register is predefined in avr/io.h library. So,
- PA0 = 0
- PA1 = 1
- PA2 = 2 …
Likewise every pin of a port is numbered. OK so now we need to configure DDR to get an input. The pin value in DDR of which you need to take an input should be 0. If you need to get an input from PA4 pin, the pin value should be 0 and other pins could be anything.
| PA7 | PA6 | PA5 | PA4 | PA3 | PA2 | PA1 | PA0 | |
| DDRA | 0 | 1 | 1 | 0 | 0 | 0 | 1 | 1 |
| PORTA | Input | Output | Output | Input | Input | Input | Output | Output |
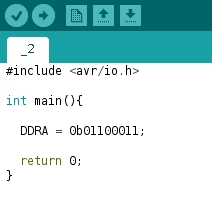
So you could do this as follows.
In here you need to mention configurations of all pins of the port. It is annoying thing to do if you’re in the middle of the program. So the best way to set port configuration is set just the needed pin to an input pin. For that you could AND the current DDR register value with 8bit binary value with only the required pin is 0.
| PA7 | PA6 | PA5 | PA4 | PA3 | PA2 | PA1 | PA0 | |
| Old DDRA | X | X | X | X | X | X | X | X |
| AND | 1 | 1 | 1 | 0 | 1 | 1 | 1 | 1 |
| New DDRA | X | X | X | 0 | X | X | X | X |
So in this way, you could change only the required pin value to 0. As I said before, pin numbers are predefined in libraries. So you could use following way to do the coding.
First we need to create following value.
| 1 | 1 | 1 | 0 | 1 | 1 | 1 | 1 |
To get this, first we create following value.
| 0 | 0 | 0 | 1 | 0 | 0 | 0 | 0 |
This could be created using following way.
(1 << PA4)
As I said, PA4 is equals to 4. So (1 << PA4) is equals to (1 << 4). So this will give the value what we needed. Then we need is the NOT value of the current value. So for that we use,
~(1 << PA4)
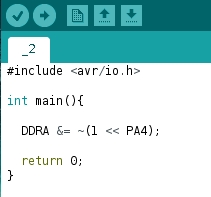
So this will give the value that we needed a the beginning. Now we need to AND this value with the current value of DDRA. So the code will be like follows.
You could read 0 or 1 that is 0V or 5V as input of the pin. So let’s create a circuit with a switch and a bulb. When the switch is pressed, the LED should be flashed. Here’s the diagram.
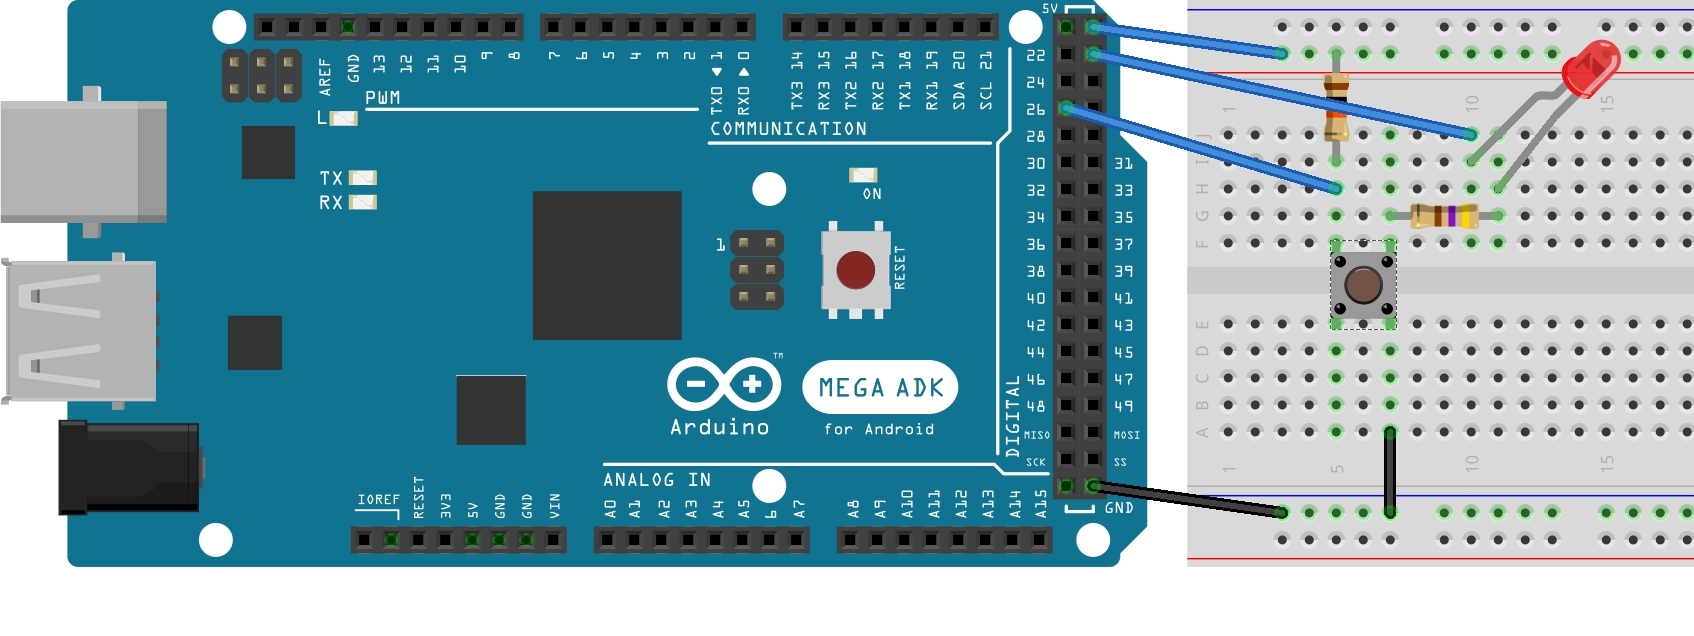

In here I have given 5V input to PA4 pin. When switch is pressed, the voltage in the PA4 pin will be 0. So,
Switch pressed – 0
Switch is not pressed – 1
Now we need to do is check weather the PA4 pin value is 0 or 1 and if the value is 0 that means the switch is pressed so we need to flash the LED.
So how to read the input? For that there’s a PIN register with all input values of the PORT. So we need to do is read the PIN register and get the PA4 value from it.
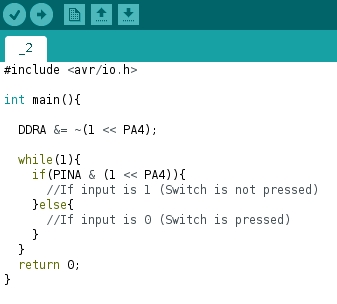
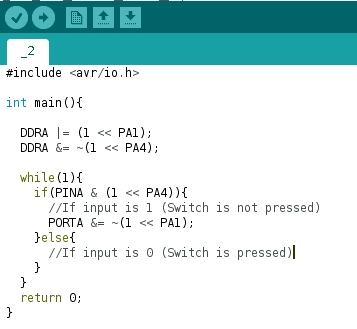
To do that, we could do AND PINA value with (1 << PA4) value. So if the input is 0, result will be false and if the input is 1, the result will be true. So let’s code it. We need an infinite loop to check the value all the time.
Now you need to turn off the LED in PA1 pin if the switch is not pressed. So you first need to make PA1 to an output by following code. We could OR the current value of DDRA with 1 << PA1 so the other pin values remain unchanged.
DDRA |= (1 << PA1);
This will change the value of only PA1 port to 1 like follows.
| PA7 | PA6 | PA5 | PA4 | PA3 | PA2 | PA1 | PA0 | |
| Old DDRA | X | X | X | 0 | X | X | X | X |
| OR | 0 | 0 | 0 | 0 | 0 | 0 | 1 | 0 |
| New DDRA | X | X | X | 0 | X | X | 1 | X |
Then to switch off the LED, you need to set PORT value of PA1 to 0 and other values of PORTA should be remain same. So to do that again we could AND the current value of the PORTA with the NOT value of (1 << PA1) like follows.
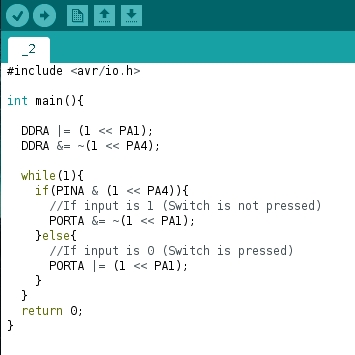
Now we need to do is change PORT value of PA1 pin to 1 if the switch is pressed. Again we could OR the value in PORTA with (1 << PA1) so the other values will remains same.
Likewise try to create a circuit and a program to give 0 as the unpressed value and 1 as the pressed value. If you have ideas to improve this article or questions, plese comment them here or send us an email to fosmedia@fos.cmb.ac.lk