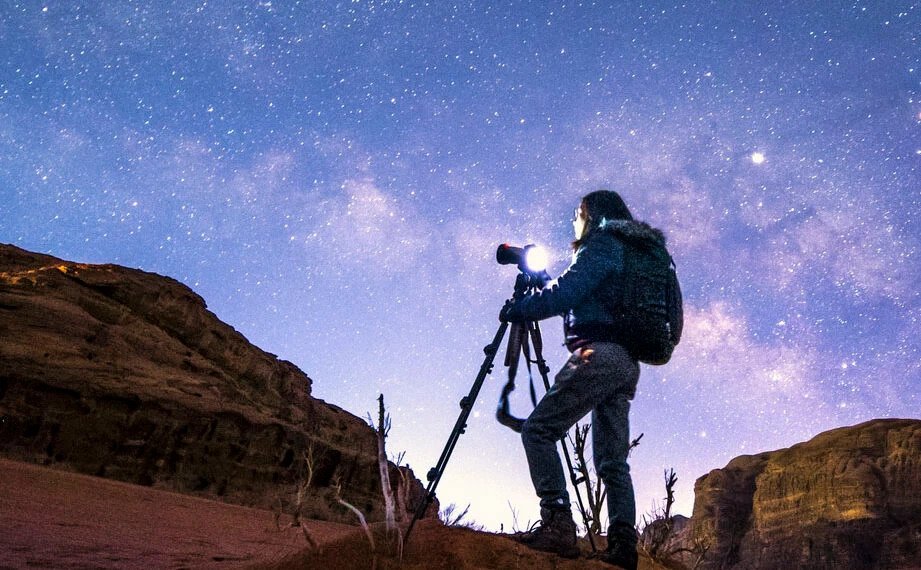
Astrophotography is a sub-discipline of scientific photography and amateur astronomy. And it is a very well-beloved photographic genre as well. Astrophotography is all about capturing astronomical objects such as planets, moons & nebulas, celestial events such as eclipses, propositions, and some areas in the sky. This has been an extraordinary hobby and a field of photography for both astronomy and photography enthusiasts. And this is a perfect example of the instances that bridge science and photography.

Why is astrophotography so important?
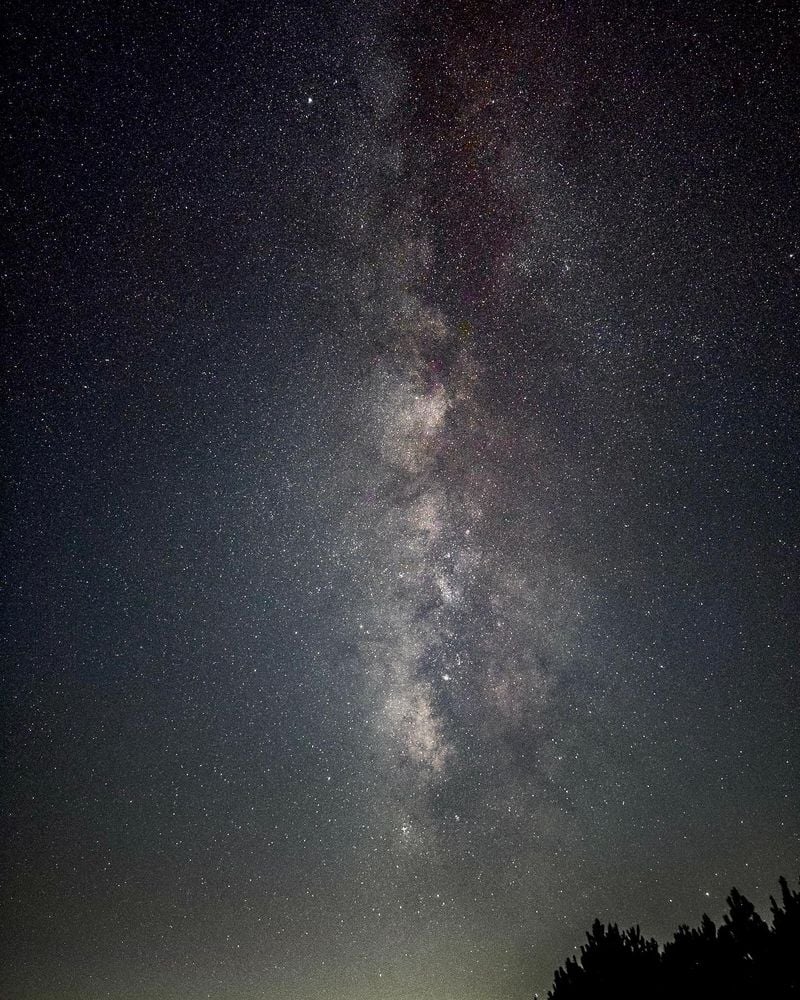
This genre of photography allows us to have a glance at objects and places that are not visible to the naked eye. This opens up more and new opportunities for scientists, astronomers, and photography admirers as well. Aesthetically, looking at the night sky saturated with glittering stars is something we crave to do. So, a photograph of the night sky with a part of the Milky Way galaxy and stars always pleases our eyes. And this kind of photograph leads scientists to do a lot of amazing things such as mapping astronomical objects in the celestial spheres known as star cartography, measuring precise measurements of positions and movements of celestial bodies known as astrometry and stellar classification, and so on.
Evolution of astrophotography
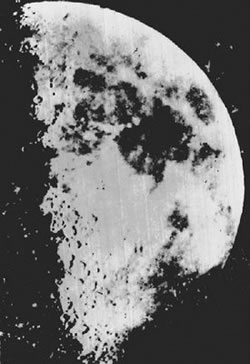
The beginning of astrophotography goes back to the 19th century. In 1839 one of the fathers of photography, Louis-Jacques-Mandé Daguerre who invented the very early photographic process called Daguerreotype tried to capture the moon but ended up with a big fuzzy white spot due to tracking errors and longer exposure times. However, the first successful photograph of the moon was captured by Prof. John William Draper in 1940 using the same techniques used by Jacques Daguerre but modified with a 5-inch reflecting telescope.
The first photograph of the sun was taken by French physicists Leon Foucault & Hippolyte Fizeau in 1845. The first photograph of the solar corona was taken during the solar eclipse of July 1851 by Dr. August Ludwig Busch & Friedrich Berkowski. They used a telescope with an aperture of 2.4 inch & focal length of 32 inches with an 84s exposure time.

With time a lot of physicists, astronomers and photographers tried to capture some stellar objects like the sun, planets, nebulas like Orion and stellar events such as eclipses as well. Therefore, it’s clear that astrophotography was more liquidated within the scientists and science community in the past times due to the lack of technical knowledge and proper instruments. Astronomical observatories backed by scientists and public universities played a big role in astrophotography back then.
Astronomical photography did not become a serious research tool until the late 19th century, but with the development of dry plate photography changed the game. And after the 20th century, refractory telescopes and large reflecting telescopes specially designed for photographic imaging were constructed worldwide. These two factors are the main reasons why this astronomical imaging is more accessible and developed within both the scientific community and photography communities nowadays. The Great Refractor at Harvard College Observatory and Paris observatory are prime examples of that.

The first all-sky photographic astronomy project, Carte du Ciel was started in 1882. In 1887 Amédée Mouchez (1821-1892) hosted the first meeting of the “Carte du Ciel” Project at the Paris observatory. Eighteen observatories agreed to cooperate and to adopt, as a standard design for a photographic telescope called Astrographs, the 33cm refractor developed by the Henry brothers: Paul Henry & Prosper Henry. The primary aim of this project was to map and photograph the whole sky but never completed.
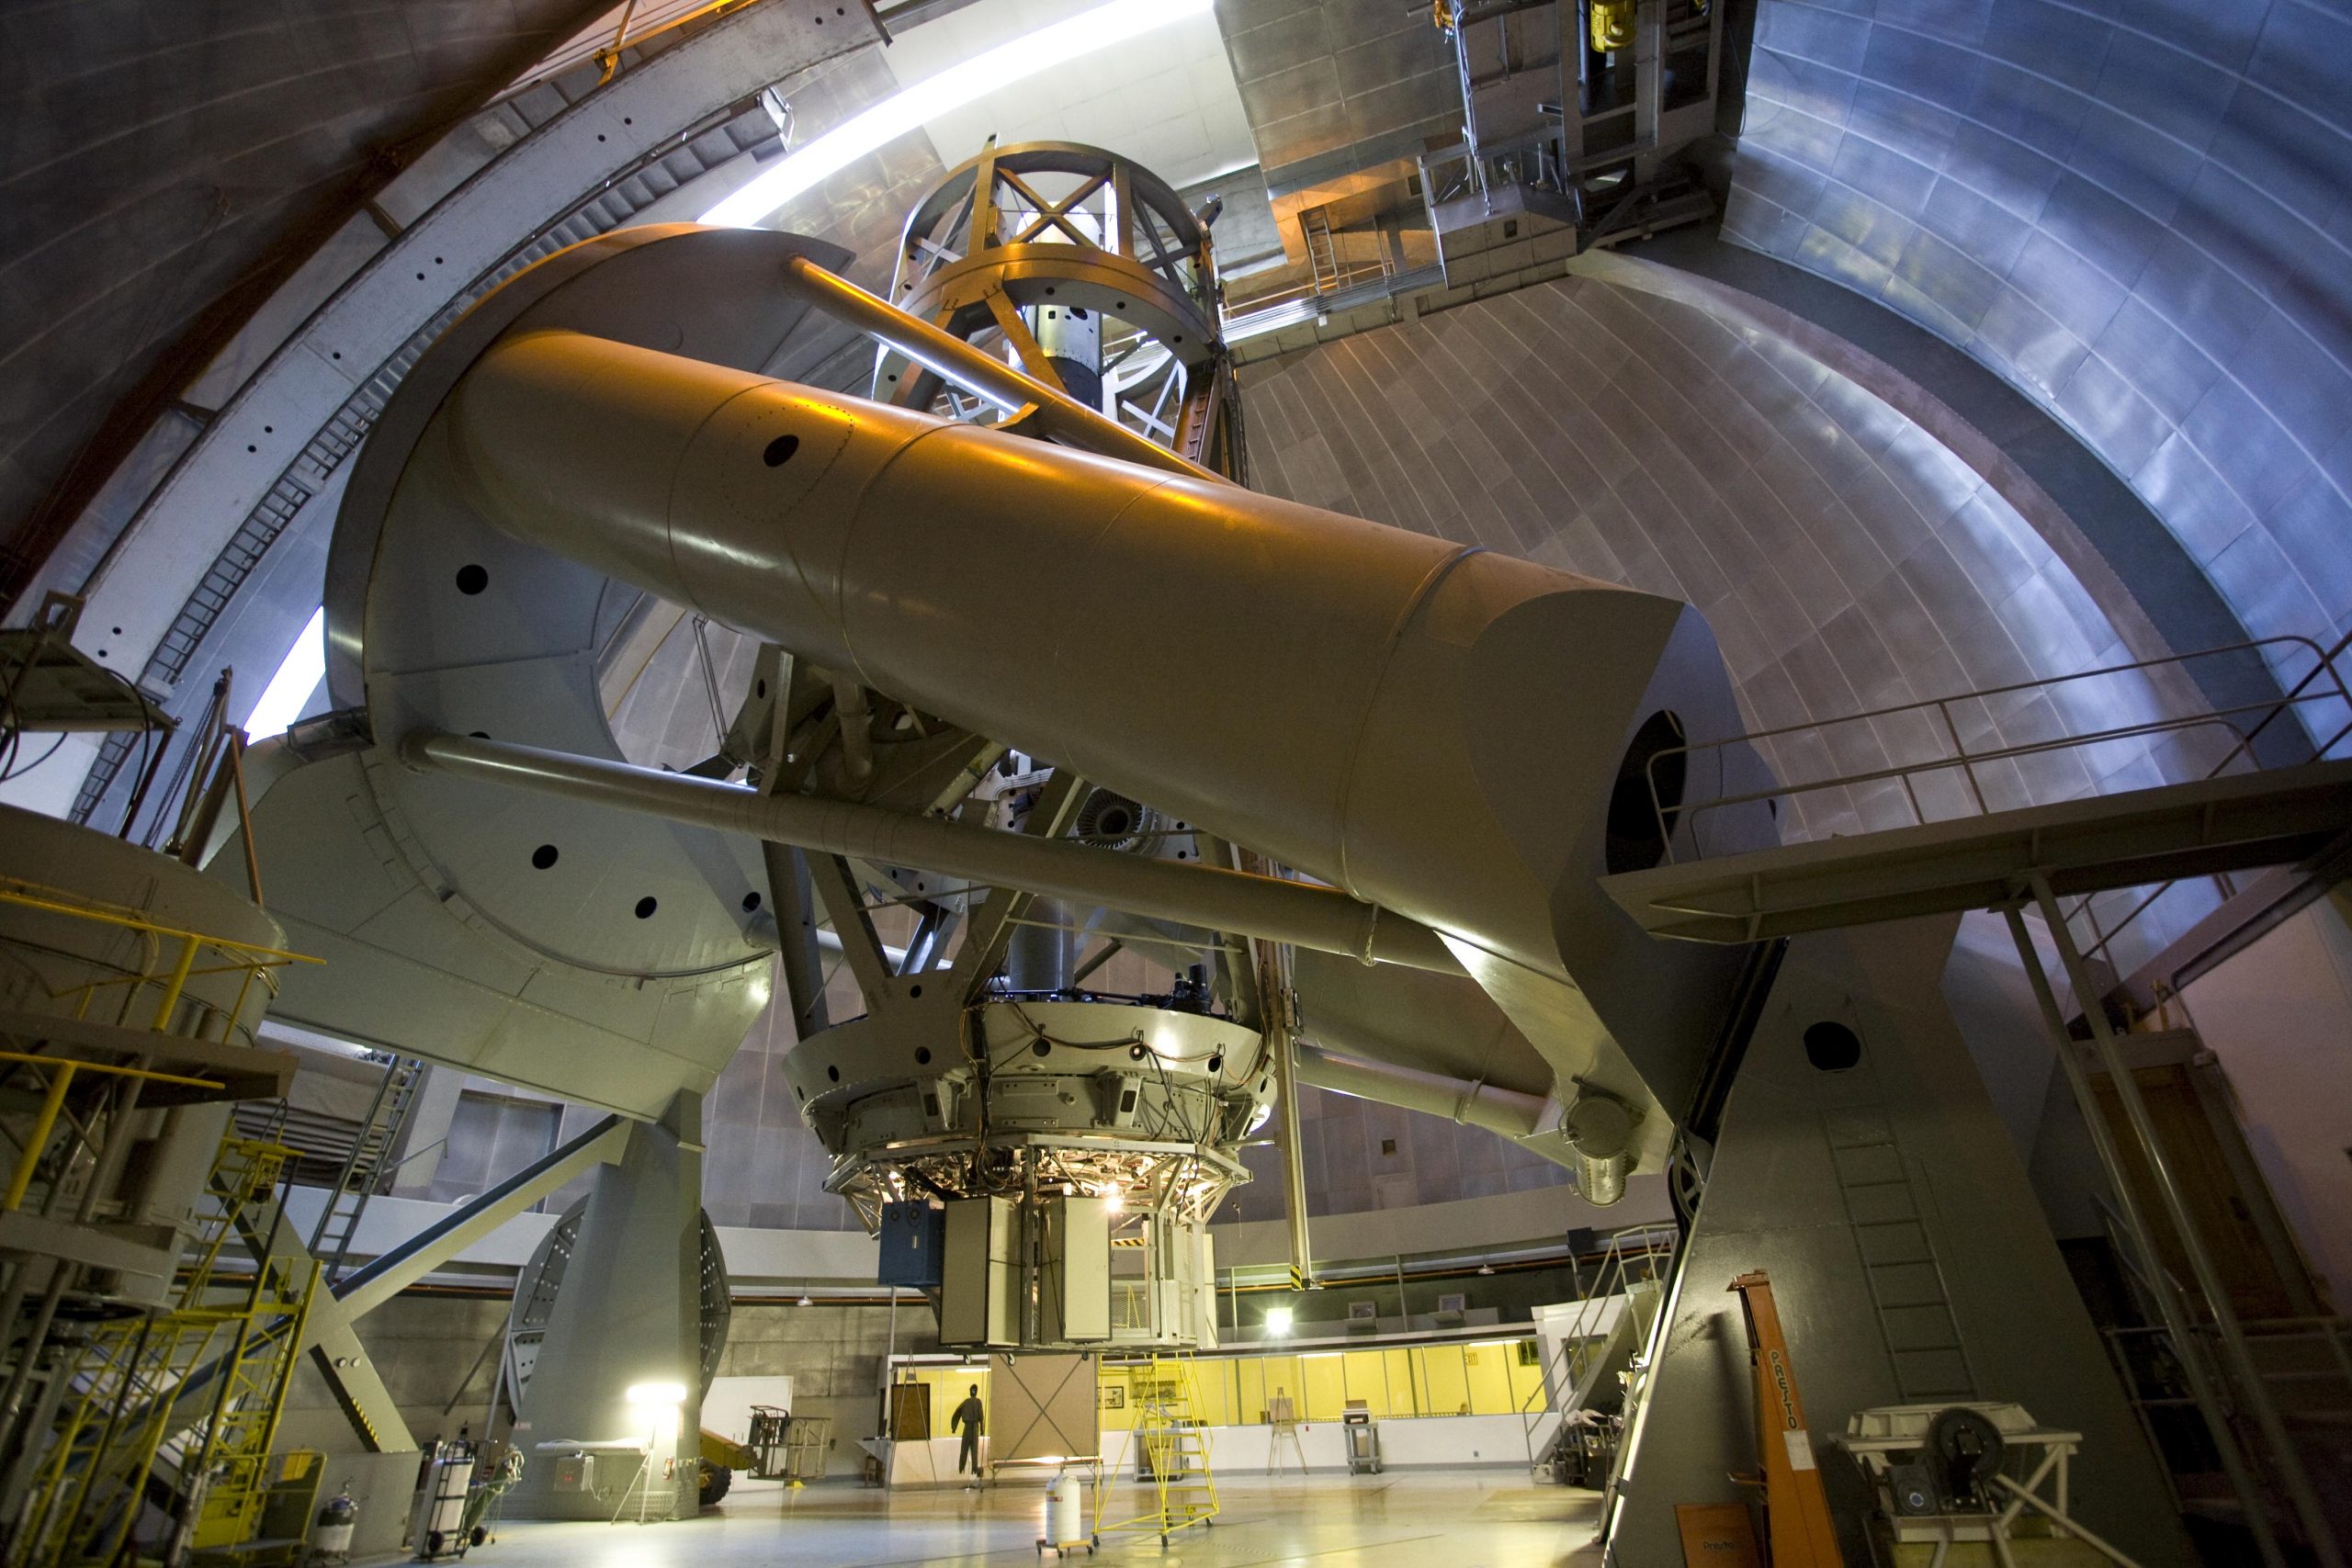
In the middle of the 20th century, the 200-inch Hale telescope & the 48-inch Samuel Oschin telescope at Palamor Observatory was pushing the limits of astronomical imaging and astronomical observations. It is still a workhorse of modern astronomy. It is used nightly for a wide range of astronomical studies. On average the weather in this observatory allows for at least some data collection about 290 nights a year.
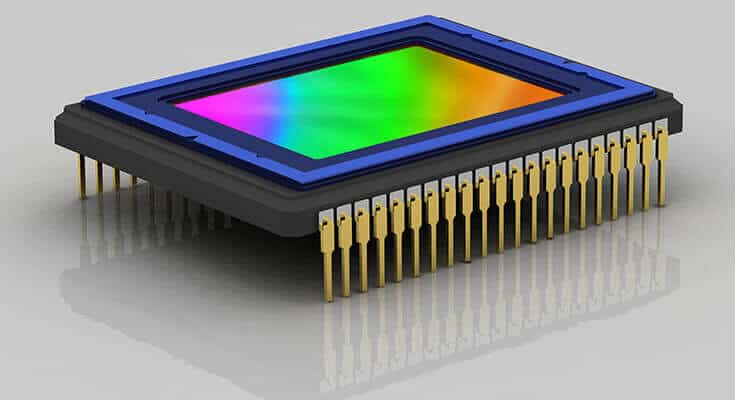
These observatories were used in a lot of trans Neptunian objects and supernova explosions as well. In 1970 the invention of the CCDs (Charged Coupled Devices) which replaced the dry photographic plates led astronomers and other photographers to the age of electronic imaging. Currently, CCDs are one of the lead players in astronomical imaging and observations. And this discovery made a huge impact on photography as well.
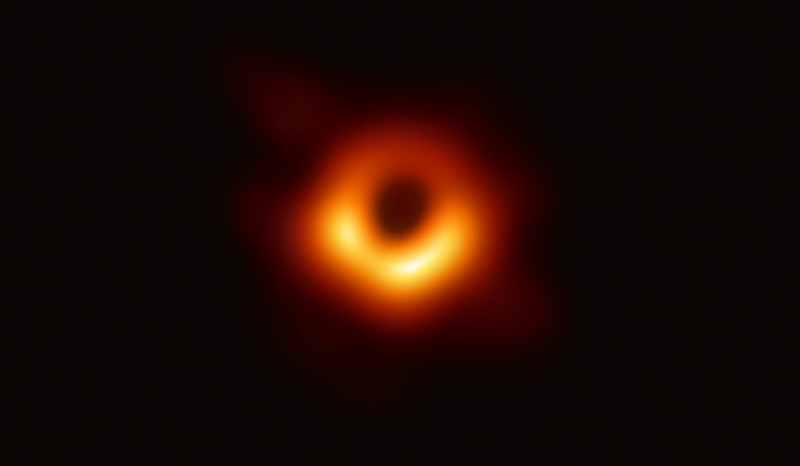
With the impressive development of consumer electronics, astrophotography has become cheaper & more accessible to the general public than ever. Especially with the development of imaging technologies and modern smartphone camera systems astronomers, photographers and enthusiasts are doing some impressive things. Astrophotography has developed from a big white fuzzy spot on the moon to capturing high-resolution images of a black hole in the center of the Milky Way and capturing deep sky objects using radio telescopes and outer atmospheric telescopes as well. Currently, outer space telescopes such as Hubble and James Webb are doing a great job in both capturing celestial objects and other deep sky observations.
Types of Astrophotography
Astrophotography can be categorized regarding two main factors, content and the technology used. According to the content, astrophotography can be found in a few different subgenres such as deep sky photography, milky way photography, landscape astrophotography and planetary astrophotography. Each one of these types are using different photographic techniques to capture some aesthetically pleasing photographs, moments and photographs enriched with a lot of scientific data and details as well. According to the techniques used, astrophotography may arise in a few different subgenres such as afocal astrophotography, piggyback astrophotography, prime focus astrophotography and eyepiece projection photography. Each these genre uses different instruments and methods to imaging processes.
Required equipment and instruments
Capturing the light coming from stars and objects which are in several light years away is really hard. We will need to have extreme patience, passion, and a few instruments as well. Here is a list of items and instruments we need to capture a photograph of the night sky with respect to the different levels of difficulties.

Beginner
- A Camera with fully manual settings (DSLR, mirrorless)
- Camera lenses
- A strong Tripod
Intermediate
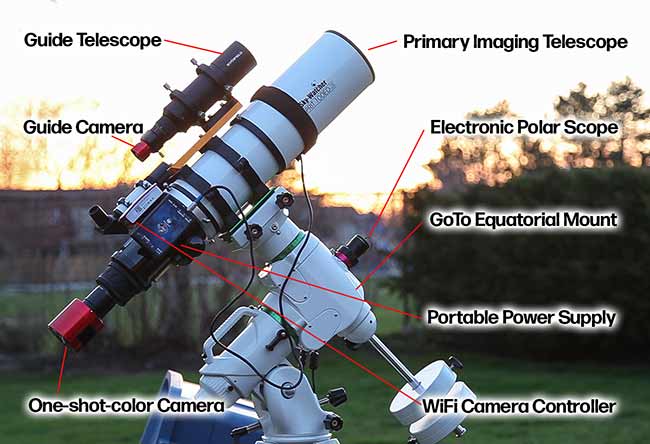
- A Telescope (with eyepieces, T-ring and other accessories)
- A tracking mount
Advanced
- Dedicated Astrophotography cameras (CMOS, CCD)
- Optical filters (light polluting, ND, solar, color, diffusion)
Extras
- A laptop (controlling & post-processing
- Portable power supply, extra batteries
- Lights / lume cubes/torches
- Remote shutter release
It’s true that we will need a thousand-dollar, maybe million-dollar astronomical powerhouse to take a proper image of a deep sky object like a nebula or a galaxy. But with the rapid development of digital imaging, we may not need to break a bank to take a decent picture of the night sky. Your smartphone or the webcam may help you to make some minds blow with some good stuff.
And here is a little insight to the things we can do with this equipment.
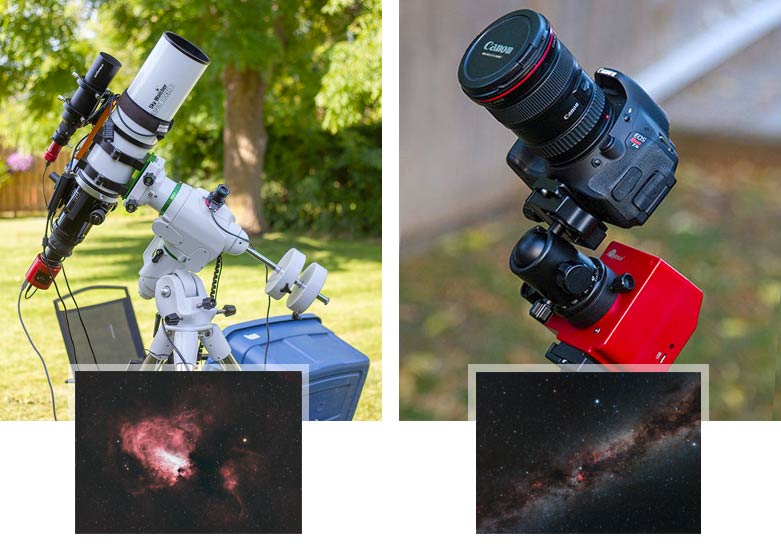
- DSLR camera & tripod – Milky way & landscape astrophotography
- DSLR camera + tracker mount – deep milky way, constellations, eclipses & other celestial events
- DSLR camera + telescope + tracker mount – Deep sky( nebulas, galaxies, etc ), Planetary imaging, solar imaging, detailed moon surface imaging
- Dedicated cameras + telescope + tracker mount – Deep sky & planetary imaging
- Smartphone camera + tripod – Milky way & landscape astrophotography
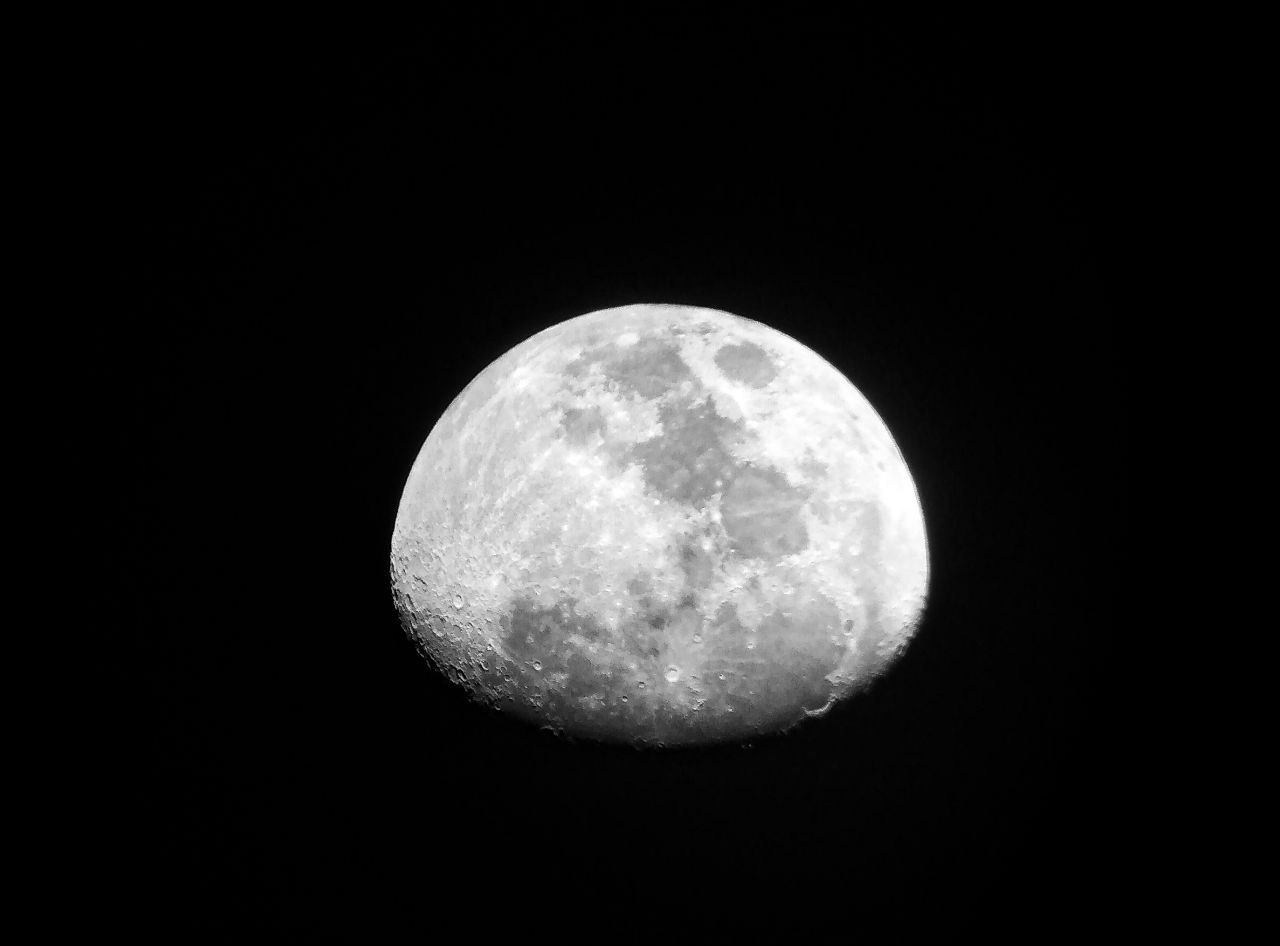
- Smartphone camera + telescope + tripod – Planetary imaging, Solar & moon surface
- Webcam + telescope + tripod – Planetary imaging, Solar & moon surface
Even though we own some expensive instruments we need some level of knowledge about astronomy and photography and an insane level of patience to make these instruments to take a good photograph. Astrophotography is not like normal street or portrait photography or capturing day-to-day moments. Maybe it will take more than 10 or 12 hours to complete a single photograph. We should defiantly plan the photo we are going to take prior to the shooting. And there is a lot of things we need to consider when planning the shooting such as choosing an ideal location, weather, moon phase, light pollution and our own safety as well (Yeah we will have to stay in extremely dark outdoors for several hours in the night). Even though we planned well, we have to go through some complicated steps. Capturing a good photograph is not an easy task here, practice, experience and patience is much needed to master the art of capturing the night sky.
With this impressive development of consumer electronics & mobile technologies, you can take photos of the moon, planets like Jupiter and Saturn and the milky way also. Nowadays, smartphone cameras are capable of doing some great things. You can use your smartphone camera to take some sort of amazing astrophotography images. But you will need to have manual control over your smartphone camera, such as adjusting the ISO and shutter speeds. If you can do so, then you are good to go. And a stable tripod for your smartphone is a must. Here are the steps that is necessary to follow to take an image of the night sky.
Steps you should follow:
- Find a target (milky way/star trails)
- Find a location with a great background and dark as much as possible (avoid lights as much as you can)
- Set up your smartphone with the tripod
- Select a higher ISO value (experiment it)
- Select the slowest shutter speed possible (30 seconds)
- Select the image format as RAW
- Take the image (take a few & choose the best)
- Edit the photo until you get the expected results
- Repeat the process
- Enjoy
With the hugely growing popularity of astrophotography, there are a lot of resources out there in order to learn and master astrophotography. And there is a ton of dedicated blogs, YouTube channels and social media accounts that can be used to learn and enjoy this so-called art. Learning astrophotography can be really adventurous and rewarding as well. It is needed to travel to places that have clear pitch black skies without zero to almost no light pollution and with some picturesque venues which will add more value to your photograph of the Milky Way. And the result is really worth the effort. So, why don’t you give it a try?
Enjoy. Clear skies…
Written by: Samuditha Saradindu
Image Courtesies
- Featured Image: https://bit.ly/3FkjRoz
- Content Image 1: https://bit.ly/3Ur1rXt
- Content Image 2: https://bit.ly/3H1yzSG
- Content Image 3: https://bit.ly/3FmPa25
- Content Image 4: https://bit.ly/3XQKk4m
- Content Image 5: https://bit.ly/3io1iqo
- Content Image 6: https://bit.ly/3OWllZc
- Content Image 7: https://bit.ly/3iCO9dq
- Content Image 8: https://bit.ly/3OVm8cW
- Content Image 9: https://bit.ly/3UnWdeZ
- Content Image 10: https://bit.ly/3EYPsuH
- Content Image 11: https://bit.ly/3B7tULf
- Content Image 12: https://bit.ly/3imIpUL
- Content Image 13: https://bit.ly/3H7sm7J
- Content Image 14: https://bit.ly/3EVVZWN